
本案例演示在OpenFOAM中利用编程创建网格。
1 创建程序框架
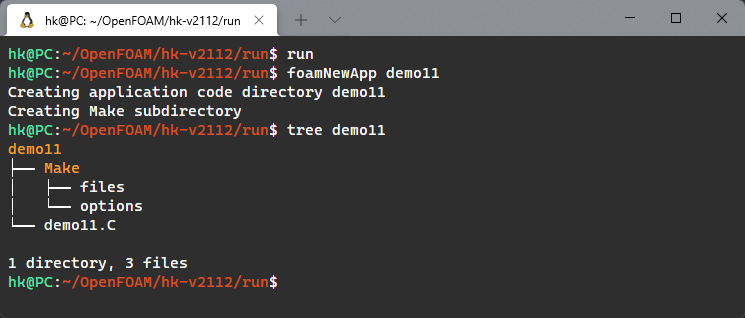
利用下面的命令创建程序框架。
run
foamNewApp demo11
文件结构如下图所示。
2 源代码
只需要处理demo11.C文件即可。
#include "fvCFD.H"
// 包含cellModeller头文件
#include "cellModeller.H"
// * * * * * * * * * * * * * * * * * * * * * * * * * * * * * * * * * * * * * //
int main(int argc, char *argv[])
{
#include "setRootCase.H"
// 定义一个Time对象runTime
Time runTime(
Time::controlDictName,
args.rootPath(),
args.caseName());
// 关闭functionObjects功能
runTime.functionObjects().off();
// 创建网格类型
// 老方法const cellModel& hex = *(cellModeller::lookup("hex"));已被废除
const cellModel &hex = *(cellModel::ptr("hex"));
const cellModel &prism = *(cellModel::ptr("prism"));
const cellModel &pyr = *(cellModel::ptr("pyr"));
const cellModel &tet = *(cellModel::ptr("tet"));
// 利用坐标值创建点,注意坐标值采用向量对象来定义
pointField points(17);
points[0] = vector(0.0, 0, 0);
points[1] = vector(0.5, 0, 0);
points[2] = vector(1.0, 0, 0);
points[3] = vector(0.0, 1, 0);
points[4] = vector(0.5, 1, 0);
points[5] = vector(1.0, 1, 0);
points[6] = vector(0.0, 0, 0.1);
points[7] = vector(0.5, 0, 0.1);
points[8] = vector(1.0, 0, 0.1);
points[9] = vector(0.0, 1, 0.1);
points[10] = vector(0.5, 1, 0.1);
points[11] = vector(1.0, 1, 0.1);
points[12] = vector(0.7, 0.5, -0.5); // tip of pyramid
points[13] = vector(0.7, 1.0, -0.5); // last point of a tet
points[14] = vector(0.7, 1.2, -0.5); // top face of a prism
points[15] = vector(0.5, 1.2, 0.0);
points[16] = vector(1.0, 1.2, 0.0);
Info << "创建点" << endl;
// 创建网格
List cells;
List<int> cellPoints(8); //利用8个点创建一个hex网格
cellPoints[0] = 0; //注意cellPoints列表中存储的是点的索引编号
cellPoints[1] = 3;
cellPoints[2] = 9;
cellPoints[3] = 6;
cellPoints[4] = 1; // 第二个面,注意点的顺序
cellPoints[5] = 4;
cellPoints[6] = 10;
cellPoints[7] = 7;
cells.append(cellShape(hex, cellPoints));
// 创建第二个hex网格
cellPoints[0] = 4;
cellPoints[1] = 10;
cellPoints[2] = 7;
cellPoints[3] = 1;
cellPoints[4] = 5;
cellPoints[5] = 11;
cellPoints[6] = 8;
cellPoints[7] = 2;
cells.append(cellShape(hex, cellPoints));
// 创建一个三棱柱网格
cellPoints.resize(6);
cellPoints[0] = 13;
cellPoints[1] = 4;
cellPoints[2] = 5;
cellPoints[3] = 14;
cellPoints[4] = 15;
cellPoints[5] = 16;
cells.append(cellShape(prism, cellPoints));
// 创建一个金字塔网格
cellPoints.resize(5);
cellPoints[0] = 4;
cellPoints[1] = 5;
cellPoints[2] = 2;
cellPoints[3] = 1;
cellPoints[4] = 12;
cells.append(cellShape(pyr, cellPoints));
// 创建一个四面体网格
cellPoints.resize(4);
cellPoints[0] = 12;
cellPoints[1] = 4;
cellPoints[2] = 5;
cellPoints[3] = 13;
cells.append(cellShape(tet, cellPoints));
Info << "创建网格" << endl;
// 创建边界
faceListList patchFaces;
List<int> patchPoints(4);
patchPoints[0] = 3; //注意点的顺序
patchPoints[1] = 9;
patchPoints[2] = 6;
patchPoints[3] = 0;
patchFaces.append(List(1, face(patchPoints)));
// create a list of faces constituting one patch
List faces(4) ;
patchPoints[0] = 14;
patchPoints[1] = 15;
patchPoints[2] = 4;
patchPoints[3] = 13;
faces[0] = face(patchPoints);
patchPoints[0] = 15;
patchPoints[1] = 16;
patchPoints[2] = 5;
patchPoints[3] = 4;
faces[1] = face(patchPoints);
patchPoints[0] = 16;
patchPoints[1] = 14;
patchPoints[2] = 13;
patchPoints[3] = 5;
faces[2] = face(patchPoints);
patchPoints.resize(3);
patchPoints[0] = 15;
patchPoints[1] = 14;
patchPoints[2] = 16;
faces[3] = face(patchPoints);
patchFaces.append(faces);
// add external faces of the tet
faces.resize(2);
patchPoints[0] = 4;
patchPoints[1] = 12;
patchPoints[2] = 13;
faces[0] = face(patchPoints);
patchPoints[0] = 13;
patchPoints[1] = 12;
patchPoints[2] = 5;
faces[1] = face(patchPoints);
patchFaces.append(faces);
// add external faces of the pyramid
faces.resize(3);
patchPoints[0] = 4;
patchPoints[1] = 1;
patchPoints[2] = 12;
faces[0] = face(patchPoints);
patchPoints[0] = 12;
patchPoints[1] = 1;
patchPoints[2] = 2;
faces[1] = face(patchPoints);
patchPoints[0] = 12;
patchPoints[1] = 2;
patchPoints[2] = 5;
faces[2] = face(patchPoints);
patchFaces.append(faces);
Info << "Created patches" << endl;
// 给边界命名
List boundaryPatchNames;
boundaryPatchNames.append("hexSide0");
boundaryPatchNames.append("prismFaces");
boundaryPatchNames.append("tetFaces");
boundaryPatchNames.append("pyramidFaces");
// 指定边界类型
wordList boundaryPatchTypes(patchFaces.size());
boundaryPatchTypes[0] = "symmetryPlane";
boundaryPatchTypes[1] = "patch";
boundaryPatchTypes[2] = "wall";
boundaryPatchTypes[3] = "symmetry";
wordList boundaryPatchPhysicalTypes(patchFaces.size());
boundaryPatchPhysicalTypes[0] = "symmetryPlane";
boundaryPatchPhysicalTypes[1] = "patch";
boundaryPatchPhysicalTypes[2] = "wall";
boundaryPatchPhysicalTypes[3] = "symmetry";
// 网格区域的名字
word regionName = polyMesh::defaultRegion;
// 未指定的边界面的名字
word defaultFaceName = "defaultFaces";
word defaultFaceType = emptyPolyPatch::typeName;
Info << "创建物理边界与默认边界" << endl;
// 创建网格
polyMesh mesh(
IOobject(
regionName,
runTime.constant(),
runTime),
points.clone(),
cells,
patchFaces,
boundaryPatchNames,
boundaryPatchTypes,
defaultFaceName,
defaultFaceType,
boundaryPatchPhysicalTypes);
Info << "创建网格对象" << endl;
Info << nl << "Wirting extrude mesh to time = " << runTime.timeName() << nl << endl;
mesh.write();
Info << "处理完毕" << endl;
// * * * * * * * * * * * * * * * * * * //
Info
<< nl;
runTime.printExecutionTime(Info);
Info << "Endn"
<< endl;
return 0;
}
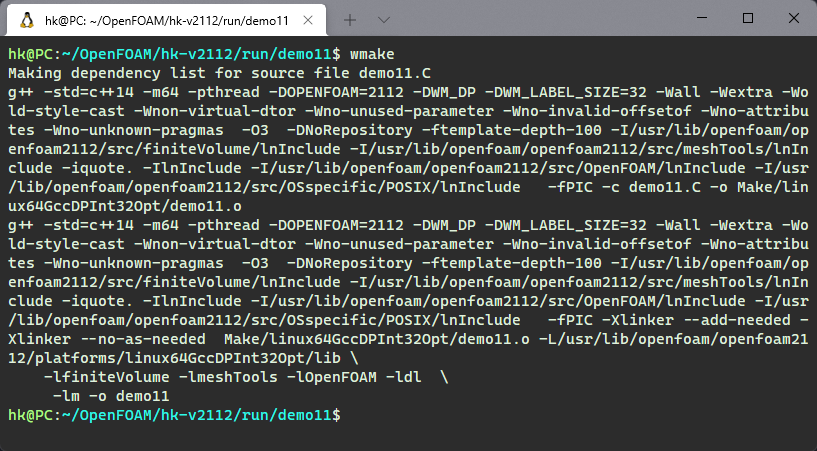
顺利编译通过,如下图所示。
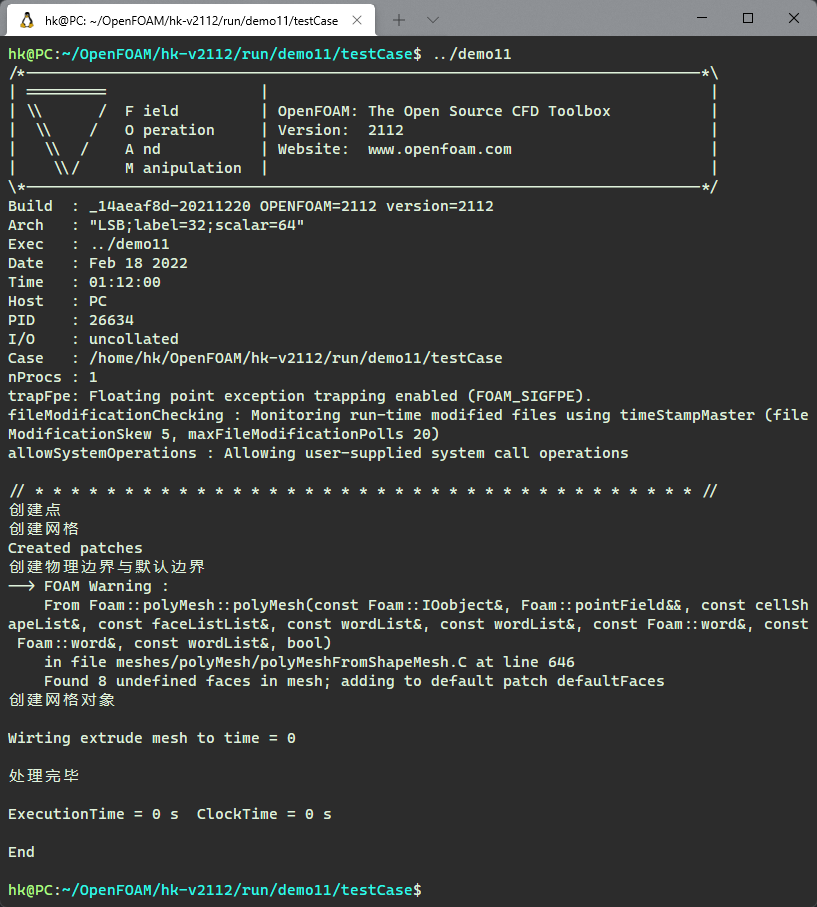
3 测试运行
测试案例不需要生成网格,可以随便拷贝一个tut案例到demo11路径下即可。
然后进入测试案例的根路径,输入命令demo11执行。出现了警告信息,可能是某个边界面写入有误,这里懒得检查了。
生成的网格如下图所示。
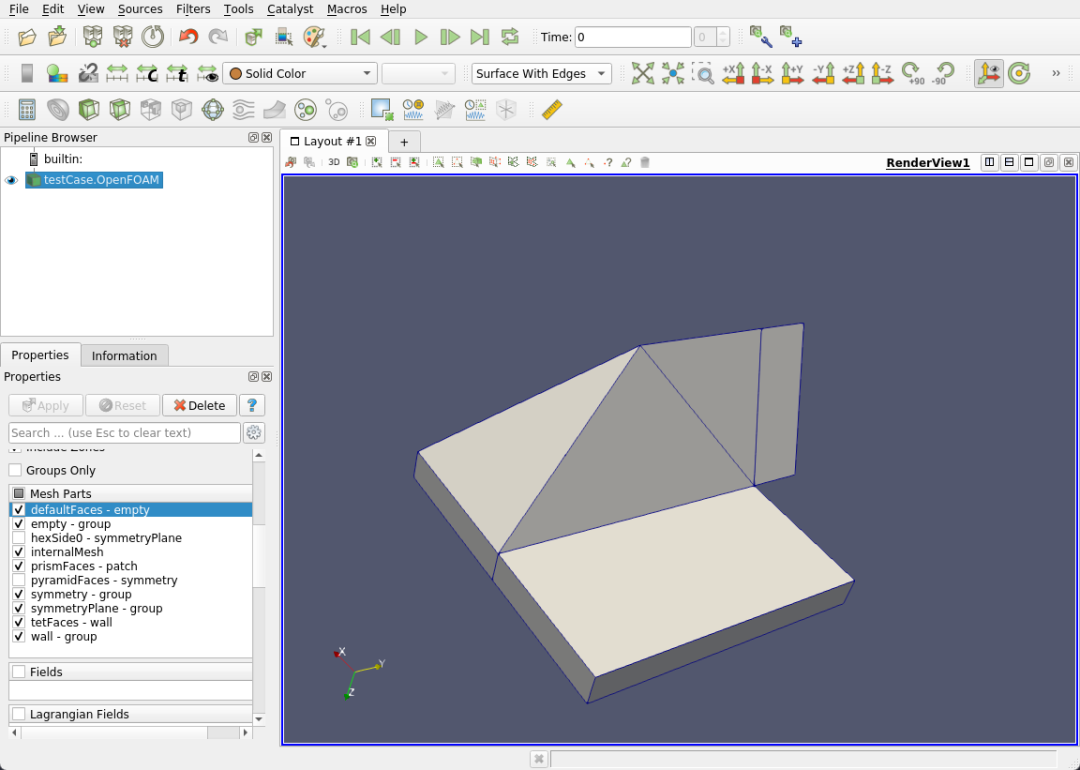
(完毕)

本篇文章来源于微信公众号: CFD之道


评论前必须登录!
注册